Explore traditional Danish pastry ingredients, step-by-step guide to making Danishes, variations of fillings, tips for perfecting dough, and creative shaping and topping ideas. Master the art of Danish pastries.
Traditional Danish pastry ingredients
Contents
When it comes to making delicious Danishes, the key is to use the right ingredients to achieve that authentic and traditional flavor. Some of the essential ingredients for making Danish pastry dough include flour, sugar, salt, yeast, butter, and milk. These ingredients are used to create the rich, buttery layers that make Danish pastries so irresistible.
Flour is the base of the dough, providing the structure and texture, while sugar adds sweetness and helps with browning during baking. Salt enhances the overall flavor, and yeast is used to leaven the dough, creating a light and airy pastry. Butter is the star ingredient, adding richness and creating those signature flaky layers. Milk adds moisture to the dough, contributing to its tenderness and richness.
It’s important to use high-quality ingredients when making Danish pastries to ensure the best possible flavor and texture. Fresh butter, high-protein flour, and pure vanilla extract can make a world of difference in the final product. When selecting ingredients, look for those labeled European-style or high-fat butter for the best results.
These traditional Danish pastry ingredients come together to create a dough that is both rich and flaky, with a delicate sweetness and buttery flavor that is perfect for showcasing a variety of delicious fillings and toppings. By using the right ingredients, you can replicate the authentic taste and texture of traditional Danish pastries right in your own kitchen.
Step-by-step guide to making Danishes
Step-by-step guide to making Danishes
Step 1: Prepare the Dough
To start making delicious Danishes, you will need to prepare the dough. In a large mixing bowl, combine 2 ¼ cups of all-purpose flour, 2 tablespoons of granulated sugar, and 1 teaspoon of salt. In a separate bowl, mix together 1 cup of warm milk, 2 ¼ teaspoons of active dry yeast, and 1 large egg. Gradually add the wet ingredients to the dry ingredients, stirring until a dough forms. Once the dough comes together, turn it out onto a lightly floured surface and knead for 5-7 minutes until smooth and elastic.
Step 2: Let the Dough Rest
After kneading the dough, place it in a greased bowl and cover it with a clean kitchen towel. Allow the dough to rest in a warm, draft-free place for about 1 hour or until it has doubled in size. This resting period allows the yeast to activate and the gluten to relax, resulting in a light and fluffy texture for your Danishes.
Step 3: Shape the Danishes
Once the dough has doubled in size, punch it down to release the air. Turn it out onto a lightly floured surface and roll it into a rectangle. Using a sharp knife or pizza cutter, cut the dough into squares or triangles, depending on the shape of Danishes you want to make. Then, place your desired filling in the center of each piece of dough and fold the edges over to form the classic Danish shape.
Step 4: Let the Danishes Rise Again
After shaping the Danishes, place them on a parchment-lined baking sheet and cover them with a clean kitchen towel. Allow the Danishes to rise for an additional 30 minutes while you preheat your oven to 375°F. This second rise will give your Danishes a light and airy texture.
Variations of Danish pastry fillings
When it comes to Danish pastry fillings, the options are truly endless. While the classic sweet cheese and fruit fillings are beloved by many, there are numerous other variations that can take your Danishes to the next level.
One popular filling option is almond paste, which adds a rich and nutty flavor to the pastries. This filling can be used on its own or combined with other flavors such as raspberry or apricot for a delicious twist.
For those with a sweet tooth, chocolate or caramel fillings are also fantastic choices. The gooey texture of caramel or the decadent richness of chocolate can make any Danish a standout treat.
If you’re looking for something a bit more savory, consider using ingredients like spinach and feta, ham and cheese, or even a breakfast sausage and egg combo. These savory fillings provide a delicious contrast to the flaky, buttery pastry.
In addition to these options, don’t be afraid to get creative with your Danish pastry fillings. Ingredients like Nutella, peanut butter, or even seasonal fruits and spices can inspire unique and delightful flavor combinations.
Tips for perfecting Danish pastry dough
When it comes to creating the perfect Danish pastry, the dough is the most crucial element. Achieving the right texture and consistency can be tricky, but with the right tips and techniques, you can make sure your pastries turn out delicious every time.
One of the most important things to remember when making Danish pastry dough is to use cold ingredients. This includes using cold butter and keeping all other ingredients chilled throughout the process. Cold ingredients are essential for achieving the flaky and buttery layers that Danish pastries are known for.
Another key tip for perfecting Danish pastry dough is to handle the dough gently. Overworking the dough can result in tough, dense pastries, so it’s important to handle it as little as possible. Use a light touch when rolling and folding the dough to ensure that the layers remain light and airy.
It’s also crucial to give the dough time to rest between each round of rolling and folding. This allows the gluten to relax and prevents the dough from becoming too elastic. Patience is key when it comes to making Danish pastry dough, so be sure to factor in plenty of time for resting and chilling the dough.
Finally, don’t be afraid to experiment with different types of flour when making Danish pastry dough. While traditional recipes call for all-purpose flour, you may find that using a combination of all-purpose and pastry flour results in a lighter and flakier texture. Feel free to test out different flour options to find the perfect combination for your own signature Danish pastry dough.
Creative shaping and topping ideas for Danishes
When it comes to shaping and topping ideas for Danishes, the possibilities are endless. Whether you prefer the classic look of a braided pastry or want to get creative with unique shapes, there are plenty of ways to make your pastries stand out.
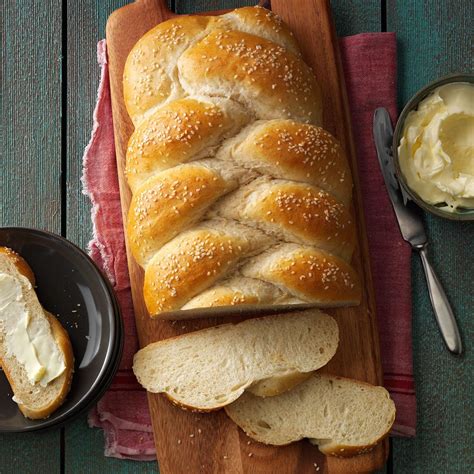
One popular option for shaping Danishes is the classic pinwheel shape. This involves cutting the pastry into squares and folding the corners into the center to create a pinwheel effect. Another option is to braid the pastry by cutting the dough into strips and twisting them together. Both of these techniques create an impressive visual appeal that will make your Danishes look as good as they taste.
When it comes to topping ideas for Danishes, there are also endless options to choose from. Classic Danish pastries often feature a simple glaze or sprinkling of powdered sugar, but you can take things a step further by adding toppings like sliced almonds, chopped nuts, or even a drizzle of chocolate or caramel. For a fruity twist, consider adding a dollop of fruit preserves or fresh berries to the top of your pastries before baking.
Another fun way to add flavor and visual interest to your Danishes is by incorporating unique fillings. From traditional options like almond paste and pastry cream to more unexpected choices like lemon curd or Nutella, the filling you choose can have a big impact on the overall flavor of your pastries. Don’t be afraid to experiment with different combinations to find the perfect filling for your Danishes.
Overall, the key to creating stunning Danishes lies in getting creative with your shaping and topping ideas. Whether you stick to classic shapes and toppings or take a more unconventional approach, the most important thing is to have fun and let your creativity shine through in your baking. With these shaping and topping ideas in mind, you’ll be well on your way to making Danishes that are as beautiful as they are delicious.


