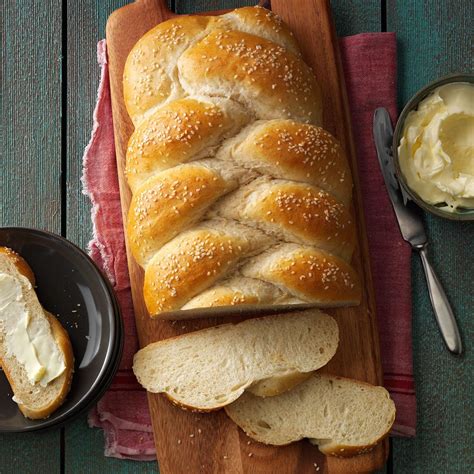
Learn the essential ingredients, yeast activation, kneading techniques, proofing tips, and recipe variations for perfect homemade yeast bread. Expert advice for baking success!
Basic Ingredients for Yeast Breads
Contents
When it comes to making delicious and fluffy yeast breads, it is important to start with the right basic ingredients. These ingredients are essential for the activation and fermentation of the yeast, which is what gives yeast breads their light and airy texture. The primary ingredients for yeast breads include flour, yeast, water, sugar, and salt.
First and foremost, flour is the main component of yeast breads. It provides the structure and base for the dough. It is important to choose the right type of flour, such as bread flour, all-purpose flour, or whole wheat flour, depending on the desired texture and flavor of the bread.
Next, yeast is a crucial ingredient for yeast breads, as it is responsible for the fermentation process that causes the bread to rise. There are different types of yeast available, including active dry yeast and instant yeast, each of which requires specific activation methods and processing.
Water is also an essential ingredient, as it hydrates the flour and activates the yeast. The temperature of the water is critical, as it can affect the activation of the yeast and the overall texture of the bread. It is recommended to use warm water, typically between 110-115°F, to activate the yeast effectively.
In addition to flour, yeast, and water, sugar and salt are also important for yeast breads. Sugar serves as food for the yeast, promoting its fermentation and allowing it to produce carbon dioxide gas, which causes the dough to rise. Salt, on the other hand, controls the fermentation process, strengthens the dough, and enhances the flavor of the bread.
Understanding the Yeast Activation Process
Understanding the yeast activation process is crucial for successful bread baking. This process involves waking up the dormant yeast cells and getting them ready to do their job of fermenting the dough. The first step in activating yeast is to dissolve it in warm water (about 110°F). This provides the perfect environment for the yeast to feed and multiply.
Once the yeast is mixed with the warm water, it needs to sit for a few minutes to allow the granules to hydrate and dissolve. It’s important to use fresh yeast for this step, as expired yeast may not activate properly. The water should be the right temperature – too hot and it can kill the yeast, too cold and it won’t activate.
After a few minutes, the yeast mixture should be foamy and bubbling, indicating that the yeast is active and ready to be added to the bread dough. This activated yeast will give the dough the rise and texture that we expect from yeast breads.
Understanding how to properly activate yeast is the foundation for successful bread recipes. Without this step, the bread dough will not rise and the end product will be dense and heavy. By following the proper yeast activation process, you can ensure that your bread turns out light, airy, and delicious.
Different Kneading Techniques for Yeast Breads
When it comes to making delicious yeast breads, kneading the dough is a crucial step that can greatly impact the final outcome. There are various kneading techniques that can be used, each with its own benefits and effects on the texture and structure of the bread. Learning and mastering different kneading techniques can help you achieve the perfect loaf of yeast bread.
One popular kneading technique is stretch and fold, which involves stretching the dough and then folding it over itself repeatedly. This technique helps to develop the gluten in the dough and create a strong, elastic structure. Another common kneading technique is slap and fold, where the dough is repeatedly slapped down on the counter and then folded over. This method is great for dough that is very wet and sticky, as it helps to develop the gluten without sticking to your hands.
Windowpane test is another kneading technique that can be used to determine if the dough has been kneaded enough. To perform this test, you stretch a small piece of dough between your fingers to see if it forms a thin, translucent membrane without tearing. If the dough tears easily, it needs more kneading. If it stretches without tearing, it is ready.
For those who prefer a more traditional approach, hand kneading is a classic kneading technique that involves using your hands to work the dough on a lightly floured surface. This method allows you to feel the texture and consistency of the dough, making it easier to gauge when it has been kneaded to perfection.
Experimenting with different kneading techniques can help you find the method that works best for you and your preferred yeast bread recipes. Whether you prefer a hands-on approach or a more modern technique, the key is to knead the dough until it is smooth, elastic, and has a good gluten structure.
Tips for Proper Proofing of Yeast Breads
Proper proofing is a crucial step in the bread-making process. Proofing refers to the final rise that shaped dough undergoes before baking. It allows the gluten to relax and the yeast to produce carbon dioxide gas, which gives the bread its light and airy texture. To ensure the best results, follow these tips for proper proofing of yeast breads:
1. Use a warm, draft-free environment: Yeast activates best in a warm environment, typically around 75-85°F. Find a warm spot in your kitchen, such as near a sunny window or on top of a warm appliance, to let your dough proof.
2. Allow enough time: Proper proofing takes time—usually 1-2 hours, depending on the recipe and room temperature. Be patient and give your dough the time it needs to rise properly.
3. Use the poke test: To determine if your dough has proofed enough, gently press two fingers into the dough. If the indentation remains, the dough is ready to bake. If it springs back, it needs more time to proof.
4. Cover your dough: To prevent the dough from forming a dry crust while proofing, cover it with a clean kitchen towel or plastic wrap. This also helps to create a warm, humid environment for optimal proofing.
Variations and Add-Ins for Yeast Bread Recipes
When it comes to making yeast bread recipes, it’s all about getting creative with different variations and add-ins to enhance the flavor and texture of the bread. By adding various ingredients, you can create unique and delicious bread that will impress your family and friends.
One popular variation is adding herbs and spices to the dough, such as rosemary, thyme, or garlic. These additions not only add flavor but also give the bread a beautiful aroma. Another option is incorporating different types of cheese, like cheddar, parmesan, or feta, to create a savory and cheesy bread that pairs well with soups and salads.
For those with a sweet tooth, adding dried fruits, nuts, or chocolate chips can take your yeast bread to the next level. Whether it’s cranberry walnut bread, chocolate chip brioche, or apricot almond loaf, the possibilities are endless when it comes to sweet add-ins.
Additionally, experimenting with alternative flours such as whole wheat, rye, or spelt can give your bread a unique taste and texture. These flours can also add a nutritional boost to your homemade bread, making it a healthier option.
Lastly, don’t forget about fun and creative toppings like seeds, rolled oats, or even caramelized onions, which can add crunch, flavor, and visual appeal to your bread. These little touches can truly make your yeast bread recipes stand out and become a favorite in your household.

