Get expert tips on choosing, prepping, and applying gel nail kits for the perfect short nail shape and long-lasting results. Improve your gel nail game today!
Choosing the Right Gel Nail Kit
Contents
Choosing the right gel nail kit is essential for achieving salon-quality results at home. When shopping for a gel nail kit, it’s important to consider the quality of the products included. Look for kits that contain high-quality gel polishes in a variety of colors, as well as a durable LED or UV lamp for curing the gel. Additionally, check to see if the kit includes essential tools such as nail files, cuticle pushers, and nail cleanser for prepping the nails.
Another factor to consider when choosing a gel nail kit is the brand reputation. Look for kits from well-known and reputable brands in the nail industry, as these are more likely to deliver professional results. Reading customer reviews can also be helpful in determining the quality and performance of a gel nail kit before making a purchase.
It’s also important to consider your skill level when choosing a gel nail kit. If you’re a beginner, opt for a kit that includes detailed instructions and beginner-friendly products. For more experienced users, a kit with advanced nail art tools and additional gel nail colors may be more suitable.
Ultimately, when choosing a gel nail kit, it’s important to prioritize quality, reputation, and your skill level to ensure a successful at-home gel nail experience.
Prepping Your Nails for Gel Application
Before starting the process of applying gel nails, it is important to prepare your natural nails properly. Begin by removing any existing nail polish using a gentle acetone-free nail polish remover. This will ensure that your nails are clean and free from any residue that might affect the adhesion of the gel polish.
Next, use a gentle nail file to shape and smooth the edges of your nails. Avoid using a metal file, as this can cause damage to the nail bed. Instead, opt for a fine-grit emery board to gently shape the nails and remove any rough edges. This step will create a smooth surface for the gel polish to adhere to, resulting in a more professional finish.
After filing, use a cuticle pusher or orange stick to gently push back the cuticles. This step is important for creating a clean and tidy nail bed, as any excess cuticle can interfere with the application of the gel polish. Be gentle when pushing back the cuticles to avoid causing any damage to the surrounding skin.
Once the nails are clean, shaped, and the cuticles pushed back, it’s important to thoroughly cleanse and dehydrate the nail surface. Use a lint-free nail wipe or cotton pad dampened with rubbing alcohol to remove any oils or residue from the nail plate. This will ensure that the gel polish adheres properly and lasts longer without lifting or peeling.
Finally, apply a thin layer of bonder or base coat specifically designed for gel polish. This will further prep the nail surface, creating a strong bond between the natural nail and the gel polish. By following these prepping steps, you can ensure a smooth and lasting gel nail application.
Applying Gel Base Coat Correctly
When it comes to creating the perfect short gel nails, applying the base coat correctly is crucial for a long-lasting manicure. Gel base coat serves as the foundation for the rest of the gel nail application process, so it’s important to get it right from the beginning.
First and foremost, it’s essential to properly prepare the natural nails before applying the gel base coat. This involves cleaning the nails thoroughly to remove any oils or residue that could interfere with the adhesion of the base coat. Use a nail cleanser or rubbing alcohol to ensure that the nails are completely clean and dry before moving on to the next step.
Once the nails are prepped, it’s time to apply the gel base coat. Be sure to use thin, even layers of the base coat to ensure a smooth and even application. Avoid applying the gel too thick, as this can lead to uneven curing and potential chipping or peeling of the gel manicure.
After applying the gel base coat, it’s important to carefully seal the free edge of the nails to prevent the gel from lifting or peeling. Use a gentle, sweeping motion to cap the edge of the nail with the base coat, ensuring that it is fully sealed and protected.
Overall, applying the gel base coat correctly is essential for creating the perfect short gel nails. By following these tips and techniques, you can ensure a long-lasting and flawless gel manicure that will keep your nails looking fabulous for weeks to come.
Creating the Perfect Short Gel Nail Shape
If you want to create the perfect short gel nail shape, it’s important to start with properly prepped nails. Begin by removing any old nail polish and filing your nails to your desired length. Once your nails are clean and trimmed, use a gentle buffer to smooth the surface of your nails and remove any ridges. This will create a smooth canvas for your gel application.
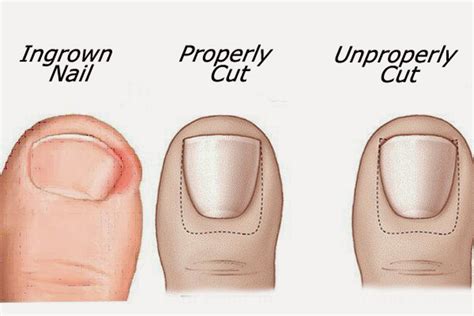
Next, choose the shape you want to create, whether it’s square, round, oval, or something in between. Use a strong pair of nail clippers or a nail file to carefully shape each nail, making sure to maintain symmetry and consistency across all nails. This step is crucial in achieving the perfect short gel nail shape.
Once you’ve achieved your desired nail shape, it’s time to apply your gel base coat. Using a quality gel base coat will help to protect your natural nails and provide a smooth surface for your gel polish. Be sure to apply the base coat evenly and avoid getting it on your cuticles or skin.
After applying the base coat, it’s time to apply your gel nail polish in the color of your choice. Whether you’re going for a classic nude or a bold pop of color, be sure to apply thin, even layers and cap the free edge of each nail to seal in the color for long-lasting wear.
Finally, finish off your short gel nail shape with a high-quality top coat. A good top coat will protect your gel polish from chipping and give your nails a glossy, professional finish. Apply the top coat carefully, making sure to seal the edges of each nail for maximum durability.
Top Coating for Long-lasting Results
Top Coating for Long-lasting Results
Top Coating for Long-lasting Results
When it comes to achieving long-lasting results for your gel nails, the top coat is a crucial step in the process. The top coat not only adds shine to your nails, but it also helps to protect the color and keep your nails looking fresh for an extended period of time. Choosing the right top coat is essential for achieving the best results.
One of the key factors to consider when selecting a top coat is the formulation. Look for a gel top coat that is designed for long-lasting wear and durability. Many brands offer top coats specifically formulated to provide a high-gloss shine and protect nails from chipping and peeling.
Another important aspect to consider is the application process. When applying the top coat, be sure to seal the edges of the nails to prevent any lifting or chipping. This will help to ensure that your gel nails stay intact for as long as possible.
It’s also helpful to look for a top coat that is compatible with the gel base coat and color gel polish that you are using. Some top coats are specifically designed to work with certain gel nail systems, so make sure to read the product labels and choose a top coat that will provide the best results with your specific gel nail kit.
Overall, the top coat is an essential step in achieving long-lasting results with your gel nails. By choosing a high-quality top coat and applying it correctly, you can enjoy beautiful, shiny nails that will last for weeks without chipping or fading.


