Get the latest on trendy glitter nail designs, innovative sparkle application techniques, choosing the perfect glitter colors, creating a glamorous ombre effect, and DIY tips for long-lasting sparkle nails.
Trendy glitter nail designs
Contents
Glitter nail designs are all the rage right now, and it’s easy to see why. The sparkle and shimmer add a touch of glamour to any look, making it perfect for special occasions or just everyday wear.
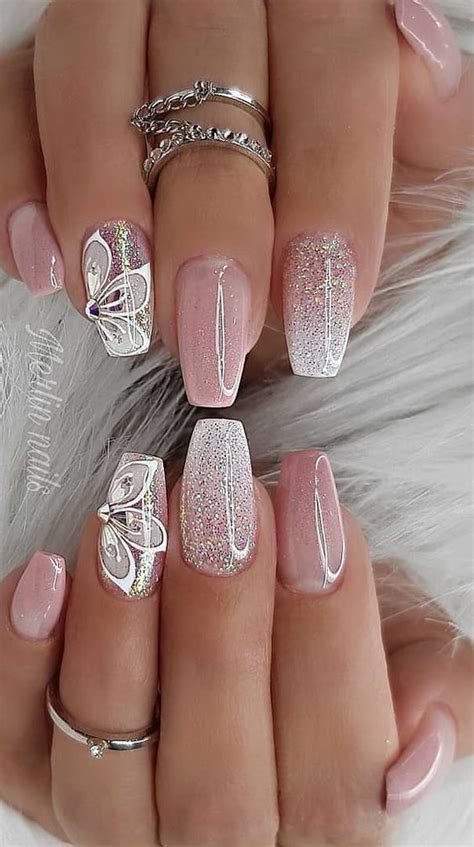
One popular trend is the glitter ombre nails, where the glitter is applied at the tips of the nails, gradually fading towards the base. This creates a stunning gradient effect that catches the light and adds a subtle sparkle to your manicure.
Another trendy design is the glitter accent nail, where one nail is painted with a solid color and then adorned with a generous amount of glitter. This adds a pop of sparkle to your manicure without overwhelming the entire look.
If you’re feeling extra bold, you can also experiment with mixed glitter nail designs, where different colors and sizes of glitter are used to create intricate and unique patterns on each nail.
Whether you prefer a subtle touch of sparkle or want to go all out with a glittery masterpiece, there are plenty of trendy glitter nail designs to choose from.
Innovative sparkle application techniques
Are you looking for new and innovative ways to apply sparkly and glittery nail designs? Look no further! We’ve got some creative techniques that will take your nail art to the next level.
One technique to try is using a makeup sponge to apply the glitter. Simply dab the sponge into the glitter polish and then press it onto your nails. This creates a sparkling and seamless gradient effect that is sure to turn heads.
Another innventive technique is to use a fan brush to dust the glitter onto your nails. This gives a more subtle and textured look that is perfect for those who want a more understated sparkly design.
For a more detailed and intricate look, try using nail tape or stencils to create patterns with the glitter. This will give you a precise and professional look that is sure to impress.
Lastly, don’t be afraid to mix different types of glitter together to create a unique and eye-catching design. Experiment with different colors and sizes to really make your nails stand out.
Choosing the perfect glitter colors
When it comes to glitter nail designs, choosing the right colors is essential to achieving the perfect look. With so many options available, it can be overwhelming to narrow down the choices. One important factor to consider is the base color of your nails. If you have fair skin, pastel shades like baby pink, lavender, or mint green can complement your complexion. On the other hand, medium to dark skin tones can opt for bold shades such as royal blue, emerald green, or deep purple to make the glitter pop.
Another aspect to keep in mind is the occasion for which you are creating the sparkly nails. For a casual look, softer shades like silver, gold, or rose gold can be perfect for a subtle touch of glamour. If you are preparing for a special event or a night out, consider more vibrant and eye-catching colors like ruby red, sapphire blue, or holographic glitter for a show-stopping effect.
Furthermore, the season can also influence your choice of glitter colors. During the spring and summer months, lighter and brighter shades are a popular choice. Think about pastel pinks, sky blues, and shimmering whites to reflect the sunny and cheerful atmosphere. For fall and winter, deeper and richer hues such as burgundy, forest green, and gunmetal silver can evoke a cozy and festive vibe.
Lastly, it’s important to consider your personal style and preferences. If you tend to favor classic and timeless looks, neutral shades like champagne, bronze, or taupe can add a touch of elegance to your manicure. For those who love experimenting with bold and unconventional colors, don’t be afraid to try out neon glitter or multi-dimensional iridescent shades to showcase your unique personality.
Creating a glamorous ombre effect
When it comes to nail designs, the ombre effect is a timeless and glamorous choice that never goes out of style. With the right glitter nail polish and application techniques, you can achieve a stunning ombre effect that adds a touch of elegance to your nails. To create a glamorous ombre effect, start by choosing two complementary glitter colors that blend seamlessly together.
Once you have your colors selected, you can begin the process of creating the ombre effect. One technique is to use a makeup sponge to apply the glitter polishes to each nail, blending the two colors together in the middle to achieve a gradient effect. Another method is to use a small nail art brush to carefully paint each color onto the nails, blending them together in the middle for a seamless transition.
After applying the glitter polish, you can add an extra touch of glamour by incorporating rhinestone or shimmer accents to enhance the ombre effect. This can be achieved by placing the accents at the transition point between the two colors, adding an extra sparkle to your nails.
Once the polish is dry, finish off the glamorous ombre effect with a clear top coat to seal in the design and add a glossy finish. With these sparkle application techniques, you can create a stunning and glamorous ombre effect that will elevate your nail design to the next level.
DIY tips for long-lasting sparkle nails
When it comes to achieving stunning, long-lasting sparkle nails at home, it’s essential to follow some key DIY tips to ensure your nail design lasts and shines for days on end. The first step is to start with a clean base – be sure to thoroughly remove any old polish and cleanse your nails before beginning the application process. This will help the glitter adhere better and stay put for longer.
Next, consider using a quality base coat to create a smooth surface for the glitter to adhere to. A clear or neutral base coat works best to allow the sparkle to really pop. Additionally, using a gentle buffing motion on the surface of the nails can help the glitter particles adhere more effectively, ensuring a longer wear time.
When adding the glitter polish, be sure to apply it in thin, even layers. This will not only help the glitter spread evenly across the nail, but will also prevent clumping and ensure a smoother finish. Allow each layer to dry thoroughly before adding the next, as this will help the design stay intact for an extended period of time.
Finally, once the glitter design is complete, be sure to seal it in with a high-quality top coat. This will not only add an extra layer of protection to the design, but will also give it a glossy, long-lasting finish. Additionally, applying an additional top coat every few days can help extend the life of the sparkle nails, keeping them looking gorgeous for weeks to come.


