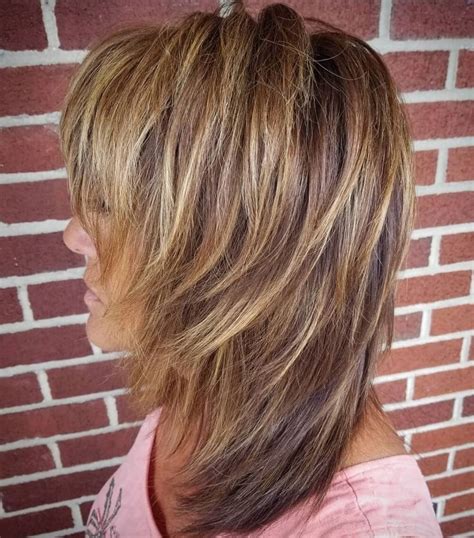
Discover the best hair color stripping methods, from choosing the right remover to aftercare tips. Get step-by-step guidance for a successful color removal process.
Understanding Hair Color Stripping
Contents
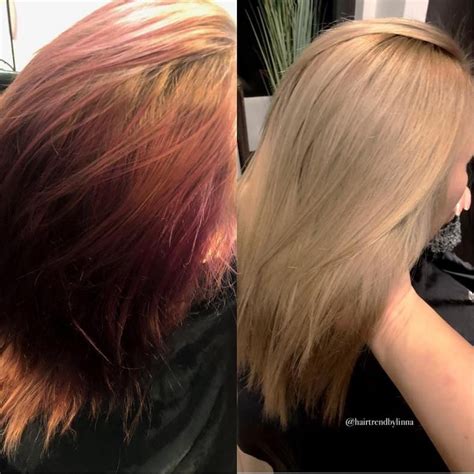
Hair color stripping is a process used to remove unwanted hair dye from the hair. This is often done when a previous dye job didn’t turn out as expected, or when someone wants to switch to a different color. It’s important to understand that this process can be damaging to the hair, so it’s crucial to take the necessary precautions and to follow the correct steps in order to minimize damage.
There are several methods for hair color stripping, including the use of hair color remover products, bleach, and color correction treatments. It’s important to carefully consider which method is the best for your hair type and condition. Consulting with a professional hairstylist is highly recommended in order to determine the best course of action.
When preparing for a hair color stripping treatment, it’s important to conduct a patch test to check for any allergic reactions or adverse effects. This can help prevent any unexpected complications during the process.
Understanding the step-by-step color stripping process is crucial in order to achieve the desired results while minimizing damage to the hair. The aftercare and maintenance tips are also important to ensure that the hair remains healthy and strong after the stripping process is complete.
Choosing the Right Hair Color Remover
When it comes to choosing the right hair color remover, it’s important to consider a few key factors. First and foremost, you’ll want to determine whether you need a permanent or semi-permanent color remover. If you’re looking to completely remove a permanent hair color, you’ll need a stronger formula than if you’re simply trying to lighten a semi-permanent shade. Additionally, consider the condition of your hair – if it’s already damaged or dry, you’ll want to opt for a gentle, moisturizing formula that won’t cause further harm.
Another important consideration when choosing a hair color remover is the level of color correction you’re seeking. If you’re looking to simply lighten a dark shade, you’ll need a different product than if you’re trying to neutralize unwanted tones, such as brassy or orange undertones. Take the time to read product reviews and seek recommendations from trusted hairstylists to determine which product will best suit your needs.
It’s also crucial to consider the ingredients in the hair color remover you choose. Look for products that are free from harsh chemicals, such as ammonia and bleach, which can further damage your hair. Opt for formulas that are enriched with conditioning agents and nourishing oils to help maintain the health of your hair throughout the color removal process.
Finally, before choosing a hair color remover, it’s essential to conduct a patch test to ensure that you don’t experience any adverse reactions. Apply a small amount of the product to a discreet area of skin and wait 24-48 hours to ensure that you don’t experience any irritation or allergic reactions. This simple step can help prevent potential harm and ensure a safe and successful color removal process.
Preparation and Patch Testing
Before you proceed with the hair color stripping process, it is crucial to properly prepare yourself and perform a patch test to avoid any potential allergic reactions or adverse effects. This step is often overlooked but is absolutely essential for ensuring your safety and the success of the color stripping process.
Firstly, it is important to gather all the necessary tools and products for the color stripping process. This includes a hair color remover, gloves, applicator brush, and a timer. Read the instructions on the hair color remover carefully and ensure that you have a well-ventilated space to carry out the process.
Next, perform a patch test at least 48 hours before the scheduled color stripping process. This involves applying a small amount of the hair color remover to a small, inconspicuous area of your skin, such as behind the ear. Leave it on for the recommended amount of time and observe for any signs of irritation or allergic reaction. If you experience any discomfort, redness, or itching, do not proceed with the color stripping process.
Additionally, it is important to protect your skin and hair prior to the color stripping process. Apply a thin layer of petroleum jelly along your hairline and the tops of your ears to prevent the hair color remover from coming into contact with your skin. This will help minimize any potential irritation or staining of the skin.
By taking the necessary preparations and conducting a patch test, you can minimize the risk of experiencing adverse effects during the hair color stripping process. Prioritizing safety and preparation will ultimately lead to a successful and satisfying outcome.
Step-by-Step Color Stripping Process
When it comes to stripping hair color, it’s important to follow a careful and methodical process to ensure the best results and minimize damage to your hair. Here’s a step-by-step guide:
Step 1: Assess Your Hair
Before beginning the stripping process, it’s important to assess the condition of your hair. If your hair is already damaged, brittle, or overly processed, it may not be suitable for color stripping. In such cases, it’s best to consult a professional hairstylist for advice.
Step 2: Choose the Right Hair Color Remover
Not all hair color removers are created equal, so it’s crucial to select a product that is suitable for your hair type and the specific type of color you want to remove. Look for products that are gentle and moisturizing, and avoid those that contain harsh chemicals like ammonia or bleach.
Step 3: Patch Test
Before applying the hair color remover to your entire head, it’s essential to do a patch test to check for any allergic reactions or adverse effects. Apply a small amount of the product to a discreet area of your scalp and wait for at least 24 hours to ensure that you don’t experience any negative reactions.
Step 4: Apply the Hair Color Remover
Once you’ve determined that the hair color remover is safe to use, it’s time to apply it to your hair. Follow the instructions provided with the product, making sure to saturate your hair thoroughly and evenly. Use a comb to distribute the product from roots to ends, ensuring that all strands are coated.
Step 5: Rinse and Condition
After allowing the hair color remover to process for the recommended amount of time, thoroughly rinse your hair with warm water. Follow up with a nourishing conditioner to restore moisture and minimize any potential damage. Be sure to follow the aftercare and maintenance tips to keep your stripped hair healthy and vibrant.
Aftercare and Maintenance Tips
Once you have successfully stripped your hair color, it’s important to focus on aftercare and maintenance to ensure your hair remains healthy and vibrant.
First and foremost, it’s crucial to give your hair a break from any further chemical treatments. Avoid coloring or bleaching your hair for at least a few weeks to allow it to recover from the stripping process.
Additionally, make sure to use a gentle, sulfate-free shampoo and conditioner to prevent further damage to your hair. Look for products specifically designed for color-treated or damaged hair to provide the nourishment and hydration it needs.
Regular deep conditioning treatments can also help replenish moisture and improve the overall health of your hair. Consider using a hair mask once a week to keep your strands nourished and prevent them from becoming dry and brittle.
Lastly, protect your hair from environmental stressors such as UV rays and heat styling tools. Apply a leave-in conditioner with UV protection before going out in the sun, and use heat protectant products before using any styling tools to minimize damage.

