Learn how to choose, prepare, and dry bread to create and store homemade bread crumbs. Perfect for optimizing your kitchen and reducing food waste.
Choosing the Right Bread
Contents
When making homemade bread crumbs, it is important to start with the right kind of bread. Choosing a suitable bread will ultimately determine the flavor and texture of the bread crumbs. Avoid using bread that is too soft or fresh, as it will not dry out properly and can result in soggy crumbs. Instead, opt for day-old bread or even stale bread. Additionally, it is recommended to use a bread that has a bit of substance to it, such as a hearty whole wheat or sourdough bread. This will give the bread crumbs a more robust flavor and a satisfying crunch.
Consider the intended use for the bread crumbs when selecting the type of bread. For example, if the bread crumbs will be used as a coating for fried foods, a denser bread with a firm texture would be ideal. On the other hand, if the bread crumbs will be used as a topping for casseroles or gratins, a softer bread may be more suitable. Choosing the right bread is the first step in creating delicious homemade bread crumbs that will elevate your dishes to the next level.
Additionally, it is important to consider any dietary restrictions or preferences when choosing the bread. For those following a gluten-free diet, there are many gluten-free bread options available that can be used to make gluten-free bread crumbs. Similarly, individuals with specific flavor preferences can experiment with different types of bread, such as rye, pumpernickel, or artisanal loaves, to create unique and flavorful bread crumbs.
Ultimately, the key to choosing the right bread for homemade bread crumbs is to consider the desired texture, flavor, and intended use. By selecting a suitable bread, you can ensure that your homemade bread crumbs will enhance the dishes you prepare, adding a delightful crunch and depth of flavor.
Preparing the Bread for Drying
When it comes to making homemade bread crumbs, the first step is preparing the bread for drying. This process involves using stale bread or drying out fresh bread slices. The type of bread you use can affect the final flavor and texture of the breadcrumbs, so it’s important to choose the right kind of bread for the job.
To prepare the bread for drying, start by slicing it into even pieces. This ensures that the bread dries out evenly and consistently. You can use a serrated knife to make clean cuts, and aim for slices that are around half an inch thick. This size works well for drying out the bread without making it too difficult to handle.
Once the bread is sliced, lay the pieces out on a baking sheet or cooling rack. It’s important to give the bread plenty of space to dry, so avoid overcrowding the slices. If the bread is fresh, you can simply leave it out at room temperature for a day or two to dry out. Alternatively, you can speed up the process by toasting the bread in the oven at a low temperature until it becomes dry and crispy.
Another method for preparing bread for drying is to use stale bread. If you have leftover bread that has gone slightly stale, instead of throwing it away, you can repurpose it into breadcrumbs. Simply cut the stale bread into small cubes or tear it into pieces and lay them out to dry. The stale bread will absorb moisture from the air and become perfectly dry in a matter of days.
Drying the Bread
When it comes to making homemade bread crumbs, one important step is drying the bread. Drying the bread helps to remove moisture and make the bread easier to crumble into breadcrumbs. To start, cut the bread into small cubes or tear it into pieces and spread them out on a baking sheet. Make sure the pieces are evenly spread out so that they can dry out properly.
Once you have the bread pieces spread out, you can either leave them out at room temperature to air dry for a day or two, or you can speed up the process by toasting them in the oven. If you choose to toast the bread pieces, preheat your oven to a low temperature, around 250°F, and bake the bread pieces for 15-20 minutes, or until they are completely dry and crisp.
Keep an eye on the bread pieces as they are toasting to make sure they do not burn. The key is to dry them out without browning or toasting them too much. Once the bread pieces are fully dried, remove them from the oven and let them cool completely before proceeding to the next step in the bread crumb making process.
Drying the bread is a crucial step in making homemade bread crumbs, as it ensures that the bread will crumble easily and evenly when it comes time to turn it into breadcrumbs. By following these simple steps, you can successfully dry the bread and continue on to the next stage of creating your own delicious homemade bread crumbs.
Creating Bread Crumbs
When it comes to making homemade bread crumbs, there are a few different methods you can use. One popular method is to use leftover bread that has become stale. This is a great way to reduce food waste and create a useful ingredient for cooking.
Another method is to use a food processor to grind up fresh or slightly toasted bread into fine crumbs. This can be a great option if you need bread crumbs for a recipe and don’t have any stale bread on hand.
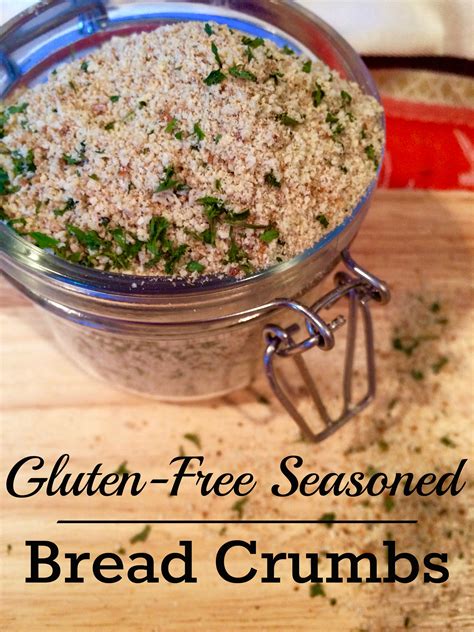
Some people also like to add seasonings to their homemade bread crumbs, such as garlic powder, Italian seasoning, or Parmesan cheese. This can add an extra level of flavor to your dishes and make your bread crumbs even more versatile.
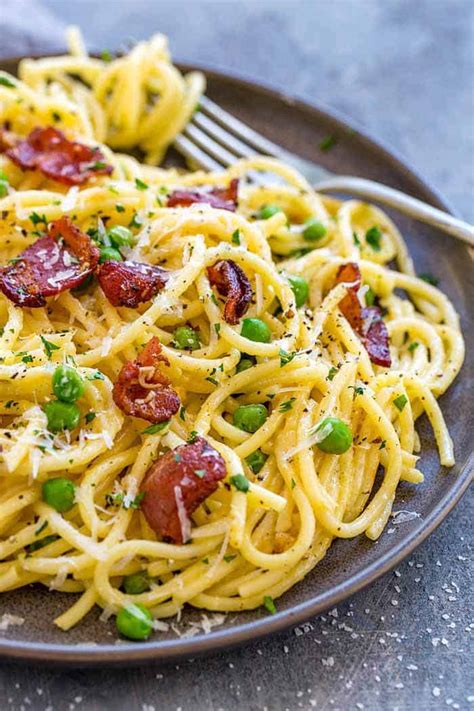
Once you have your bread crumbs prepared, you can use them in a variety of dishes, such as breading for chicken or fish, adding texture to meatloaf or meatballs, or as a topping for casseroles and pasta dishes. Homemade bread crumbs can add a delicious crunch and flavor to so many different recipes.
Storing Homemade Bread Crumbs
Once you have successfully created homemade bread crumbs, it is important to store them properly to ensure they remain fresh and flavorful for as long as possible. Storing your bread crumbs in an airtight container is essential to prevent them from becoming stale or losing their crispness. Choose a container with a tight-fitting lid, such as a glass jar or plastic storage container, and make sure it is completely clean and dry before adding the bread crumbs.
Before sealing the container, you may want to consider adding a moisture-absorbing agent, such as a silica gel packet or a small piece of bread, to help prevent the bread crumbs from becoming moist. This will help to extend their shelf life and maintain their texture. Additionally, keeping the container in a cool, dark place, such as a pantry or cupboard, will also help to preserve the quality of your homemade bread crumbs.
It is important to label your container with the date that the bread crumbs were made, as well as the type of bread used, if you made them from a specific type of bread. This will help you keep track of their freshness and ensure you use them before they begin to lose their flavor. When stored properly, homemade bread crumbs can last for several months, allowing you to enjoy the delicious taste and texture of freshly made bread crumbs in your favorite recipes.

