Discover the latest trend in floral nail art, learn how to achieve stunning floral nail designs, get tips to choose the right pattern, and maintain their longevity.
Introduction to Floral Nail Designs
Contents
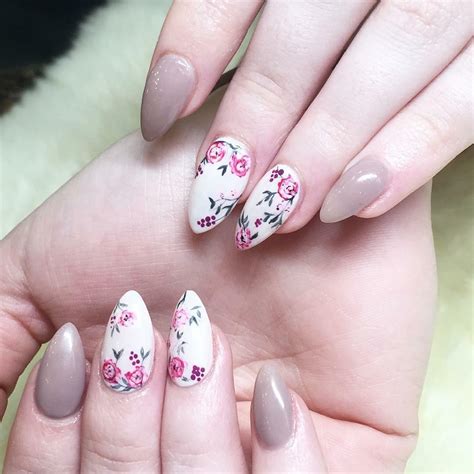
Floral nail designs have been all the rage in the beauty world, and for good reason. These intricate, beautiful designs add a touch of femininity and elegance to any manicure. From delicate roses to bold sunflowers, there is a floral nail design to suit every taste and style.
When it comes to floral nail designs, the options are endless. Whether you prefer a classic French tip with a floral accent nail or an all-over floral print, there are countless ways to incorporate this trend into your manicure.
One of the best things about floral nail designs is their versatility. They can be dressed up or down, making them perfect for any occasion. Whether you’re headed to a wedding or simply want to add a touch of whimsy to your everyday look, floral nails are a great choice.
Another reason why floral nail designs have become so popular is their longevity. With proper maintenance, a floral manicure can last for weeks, giving you plenty of time to show off your beautiful nails. Whether you opt for a gel manicure or regular polish, floral nail designs are sure to turn heads wherever you go.
Trending Floral Nail Art
Floral nail art has been making waves in the beauty and fashion world recently, and it’s easy to see why. The delicate and intricate designs of floral nail art can add a touch of elegance and femininity to any look. From dainty daisies to vibrant roses, there are endless possibilities when it comes to creating stunning floral nail designs. If you’re looking to stay on top of the latest nail art trends, then floral nail art is definitely a trend to keep an eye on.
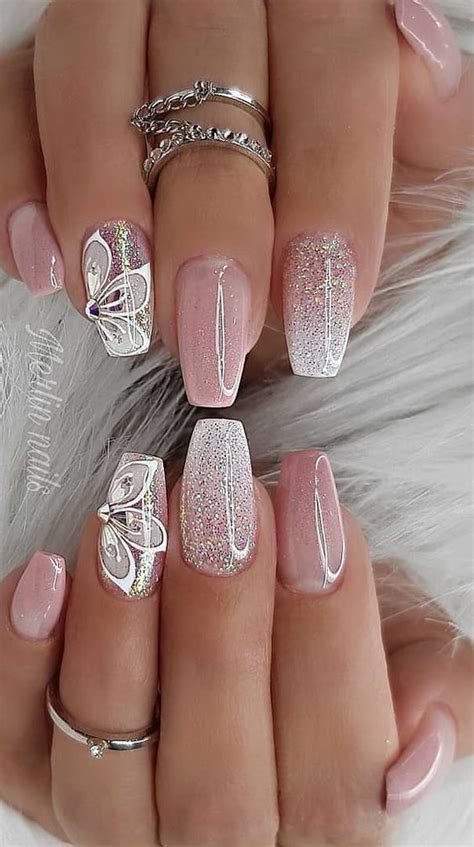
One of the most popular trends in floral nail art right now is the use of 3D embellishments. Whether it’s a tiny plastic flower or a sparkly rhinestone in the center of a bloom, adding a touch of depth to your floral nail designs can really make them stand out. This trend adds a playful and whimsical element to your manicure, and is a fun way to experiment with different textures and finishes.
Another trending floral nail art technique is the use of negative space. This design involves leaving certain areas of the nail bare, creating a contrast between the natural nail and the painted design. By incorporating negative space into your floral nail designs, you can create a modern and minimalist look that is perfect for any occasion. Whether you opt for a single blossom or an intricate vine, negative space floral nail art is sure to turn heads.
Some of the most popular color palettes for floral nail art at the moment include soft pastels, vibrant neons, and earthy tones. Pastel shades such as baby pink, mint green, and lavender are perfect for creating a sweet and delicate floral nail design. On the other hand, neon colors like hot pink, electric blue, and lime green can add a bold and exciting pop of color to your nails. For those who prefer a more understated look, earthy tones like olive green, mustard yellow, and rusty red are a great choice for creating a more muted floral design.
Steps to Achieve Floral Nail Designs
Floral nail designs are a beautiful way to add a touch of elegance to your nails. Whether you want a simple and delicate design or something more intricate and bold, there are a few steps you can follow to achieve the perfect floral nail art.
First, start by prepping your nails. This includes shaping them and applying a base coat to protect your natural nails. Once your nails are prepped, choose a background color that will complement the floral design. Light pastel shades like pink or lavender are great choices for a floral look.
Next, it’s time to create the floral design. You can use nail art brushes, dotting tools, or even toothpicks to create the petals and leaves of the flowers. Start by painting small dots in a circular shape to form the center of the flower, then use a different color to add the petals around the center.
Once you have finished creating the floral design, allow it to dry completely before applying a top coat to seal in the design and add a glossy finish. This will help your floral nail art last longer and stay looking fresh and vibrant.
Finally, don’t forget to moisturize and take care of your nails regularly to maintain the longevity of your floral nail designs. Keeping your hands and nails hydrated will prevent chipping and keep your floral nail art looking its best.
Tips for Choosing the Right Floral Pattern
Choosing the right floral pattern for your nail designs can be an overwhelming task, especially with the wide variety of options available. One of the first things to consider when selecting a floral pattern is your personal style. Do you prefer bold and vibrant flowers, or are you more drawn to delicate and subtle floral designs? Think about the overall look you want to achieve, and choose a pattern that complements your aesthetic.
Another important factor to consider is the size of the flowers in the pattern. Larger flowers can make a bold statement and are perfect for creating a dramatic look, while smaller flowers offer a more dainty and delicate appearance. You should also take into account the shape of your nails when choosing a floral pattern. For example, if you have short nails, you may want to opt for a smaller flower design that won’t overwhelm your nail beds.
Consider the color scheme of the floral pattern as well. Bright, colorful flowers can add a fun and playful touch to your nail design, while softer, pastel floral hues can create a more romantic and feminine look. Pay attention to the colors that complement your skin tone and outfit choices, and select a floral pattern that will enhance your overall appearance.
Lastly, when choosing the right floral pattern, think about the occasion for which you’ll be wearing the nail design. Whether it’s a casual day out or a special event, the floral pattern you choose should be appropriate for the setting. If you’re unsure, opt for a versatile floral design that can be worn for any occasion.
Maintenance and Longevity of Floral Nail Designs
When it comes to maintaining the floral nail designs you spent time and money on, proper care and attention to detail are key. After all, you don’t want all your hard work to chip or fade away within a few days. To ensure the longevity of your floral nail art, follow these tips and tricks.
First and foremost, always apply a top coat to seal in and protect your nail art. This will not only add shine to your floral designs, but it will also help prevent chipping and peeling. Additionally, be mindful of how you use your hands. Avoid using your nails as tools to open packages or peel off stickers, as this can cause your nail art to wear down quicker.
Furthermore, consider regular touch-ups to keep your floral nail designs looking fresh. If you notice any chips or signs of wear, don’t hesitate to do a quick fix. You can use a small brush and some nail polish to fill in any missing spots or make necessary repairs. This will help extend the life of your floral nail art between professional appointments.
Another crucial aspect of maintaining floral nail designs is to be mindful of chemical exposure. Harsh chemicals and cleaning agents can take a toll on your nails, causing the polish to fade or soften. To protect your floral nail art, wear gloves when using cleaning products and avoid prolonged exposure to harsh chemicals.
Lastly, don’t forget to moisturize. Keeping your nails and cuticles hydrated is essential for the longevity of your floral nail designs. Use a nourishing cuticle oil or hand cream to keep your nails and surrounding skin healthy and strong. By following these maintenance tips, you can enjoy your beautiful floral nail art for longer periods of time.

