Discover trendy Halloween nail designs, simple DIY techniques, spooky ideas, and quick tips for beginners. Get creative with Halloween nail art!
Trendy Halloween Nail Designs
Contents
Are you ready to show off your spooky style this Halloween?
One of the best ways to get into the Halloween spirit is by adorning your nails with some trendy and creepy designs. Whether you’re heading to a Halloween party or just want to get into the festive mood, these Nail Designs 2024 ideas are sure to inspire you.
First off, consider incorporating spooky creatures into your nail art. From ghosts to spiders to vampires, these creatures can add a touch of fright to your nails. You can use black, white, and red nail polish to create these designs, or get creative with some nail art stickers or stencils.
If you’re not into creepy creatures, you can go for a more playful Halloween look with candy corn nails or pumpkin nail art. These designs are perfect for those who want to celebrate Halloween without the scares. To achieve this look, use orange, yellow, and white nail polish to create candy corn stripes or jack-o-lantern faces on your nails.
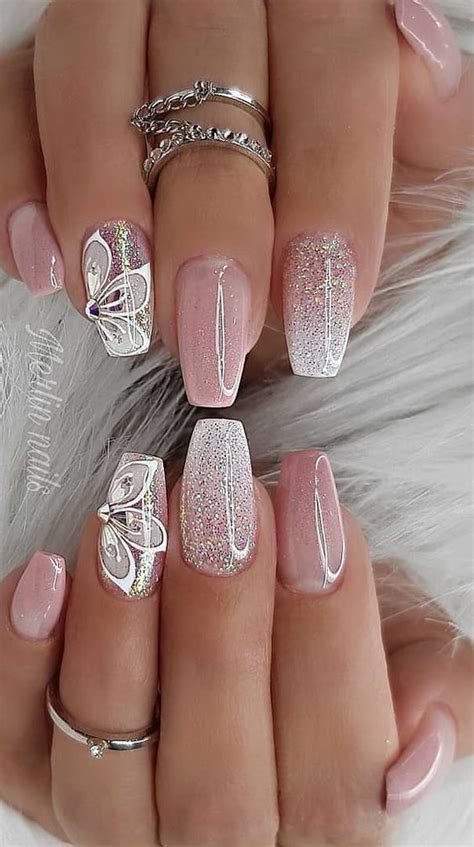
Another trendy Halloween nail design for 2024 is the glittery and sparkly nail art. Whether you choose black, orange, or purple glitter, adding some sparkle to your nails is a fun way to celebrate the holiday. You can create ombre effects, nail gradients, or even use glittery nail wraps to achieve this look.
Simple DIY Nail Art Techniques
When it comes to nail art, creating beautiful designs doesn’t have to be complicated. With the right DIY techniques, you can easily achieve stunning nail art looks at home. Whether you’re a beginner or a seasoned nail artist, there are plenty of simple and creative nail art techniques that you can try.
One popular DIY nail art technique is sponge painting. This method involves using a makeup sponge to create a gradient effect on your nails. Simply apply two or more nail polish colors onto the sponge, then gently dab the colors onto your nails to create a beautiful ombre effect. You can also use this technique to create marble designs or other unique nail art looks.
Water marbling is another fun and easy DIY nail art technique to try. This technique involves swirling nail polish colors in water and then dipping your nails into the design. The result is a stunning and intricate pattern that can’t be achieved with traditional brush strokes. With a little practice, you can create gorgeous water marbled nail art designs for Halloween or any other occasion.
If you’re looking for a simple way to add some sparkle to your nail art, consider using nail art tape. This thin, adhesive tape can be used to create clean lines, geometric patterns, and intricate designs on your nails. Simply place the tape on your nails in your desired pattern, apply your nail polish, and then carefully remove the tape to reveal your stunning nail art look.
Finally, stamping is a quick and easy DIY nail art technique that can produce professional-looking results. Nail stamping kits come with various designs and patterns that you can transfer onto your nails using a stamping tool. Simply apply nail polish to the desired design on the stamping plate, scrape off the excess polish, and then use the stamp to transfer the design onto your nails. With a little practice, you can create intricate and detailed nail art looks without any freehand painting.
Halloween Nail Art Materials
When it comes to creating Halloween nail art, the right materials can make all the difference. From eerie nail polishes to spooky nail stickers, there are plenty of options to choose from. One essential material for Halloween nail art is a quality base coat. This will help protect your nails and ensure that your spooky design lasts throughout the Halloween season. In addition to a base coat, you’ll also need a variety of nail polishes in black, orange, and other Halloween-themed colors.
Another important material for Halloween nail art is nail stencils or stickers. These can help you create intricate designs without needing to have a steady hand. Additionally, consider investing in some nail gems or glitter to add an extra touch of glamour to your Halloween nail art. Lastly, don’t forget a top coat to seal in your designs and make them last longer. With the right materials, you’ll be able to create the perfect Halloween nail art to complement your costume.
For those who prefer a more environmentally friendly approach, there are also water-based nail polishes available that are free from harmful chemicals such as formaldehyde and toluene. These nail polishes come in a variety of spooky shades and are a great option for creating eco-friendly Halloween nail art. Whether you prefer traditional nail polish or are looking for a more eco-conscious option, there are plenty of materials available to help you create stunning Halloween nail art.
Spooky Nail Art Ideas for Beginners
Are you looking for some spooky nail art ideas to try out this Halloween? If you’re a beginner and want to get into the Halloween spirit, there are plenty of simple and fun nail art designs that you can experiment with. From creepy cobwebs to cute ghosts, there are endless possibilities when it comes to creating the perfect spooky nail art.
One easy idea for beginners is to create a simple black and orange ombre effect on your nails. Start with a base coat of black polish, then use a makeup sponge to dab on some orange polish at the tips of your nails. This creates a gradient effect that is perfect for Halloween. You can also add some spooky accents like black spiders or ghostly faces for an extra creepy touch.
If you’re feeling more adventurous, you can try your hand at creating some eerie graveyard scenes on your nails. Use a dark grey or green polish as a base, then use a small brush to paint on some tombstones, crosses, and spooky trees. Finish off the look with a top coat of glow-in-the-dark polish for a truly haunting effect.
For a simple yet striking look, you can also experiment with some easy-to-use nail stickers. There are plenty of options available, from spooky bats and cats to witch hats and pumpkins. Simply apply the stickers to your nails and finish with a top coat for a quick and fun Halloween look.
Remember, the most important thing is to have fun and get creative with your spooky nail art. Whether you’re a beginner or a seasoned pro, there are endless possibilities for creating the perfect Halloween nail design. So grab your nail polish and get ready to show off your creepy and creative side this Halloween!
Quick Halloween Nail Art Tips
Quick Halloween Nail Art Tips
When it comes to creating Halloween nail art, the key is to keep it simple and fun. You don’t need to be a professional nail artist to achieve a spooky and festive look for the holiday. Here are some quick tips to help you create the perfect Halloween nail art designs.
First, start by choosing a dark and vampy nail polish color as the base for your Halloween nails. Black, dark purple, or blood red are popular choices for creating a spooky vibe. Apply two coats of your chosen nail polish to ensure a smooth and opaque base for your nail art.
Next, consider using nail stickers or stencils to create intricate designs with minimal effort. Halloween-themed stickers such as bats, spiders, and pumpkins can instantly transform your nails into a festive work of art. Simply place the stickers on your nails, press down firmly, and seal with a clear top coat for long-lasting wear.
If you’re feeling extra creative, try your hand at freehand nail art using a thin nail art brush or a toothpick. You can create simple designs such as spider webs, ghosts, or candy corn to add a playful touch to your Halloween manicure.
Lastly, don’t forget to apply a generous amount of top coat to seal in your Halloween nail art and prevent chipping. A high-quality top coat will not only protect your designs but also add a glossy finish to your nails, making them the perfect accessory for your Halloween costume.


