Get expert tips and tutorials for creating classic French manicure, ombre nail art, marble nail designs, geometric patterns, and floral nail art techniques. Achieve flawless nails today!
Classic French Manicure
Contents
The classic French manicure has been a timeless nail design that never goes out of style. This elegant and sophisticated look features a pale pink or nude base with white tips, creating a clean and polished appearance.
For a French manicure at home, start by shaping your nails into a rounded or square shape. Then, apply a base coat to protect your nails and create a smooth surface for the polish to adhere to. Next, carefully paint the tips of your nails with a white polish, using either the traditional freehand method or guide strips for a more precise line.
Once the white tips are dry, apply the pale pink or nude polish to the rest of the nail, creating a seamless transition from the tip to the base. Finish with a top coat to seal in the design and add a glossy shine.
A classic French manicure is perfect for any occasion, whether it’s a casual day at the office or a special event. Its simplicity and versatility make it a popular choice for those looking for a timeless and chic nail design.
Ombre Nail Art Tutorial
Creating a stunning ombre nail art design is easier than you think. By following these simple steps, you can achieve a beautiful gradient effect on your nails that will surely turn heads.
To begin, gather your materials. You will need at least two shades of nail polish. Start with a light color as the base and a darker shade to create the ombre effect. You will also need a makeup sponge, a small piece of paper, and a clear top coat.
First, paint your nails with the light base color and allow them to dry completely. Then, apply a small amount of each nail polish color onto the piece of paper. Next, take the makeup sponge and dab it into the two colors, making sure they slightly overlap. Gently press the sponge onto your nails, creating a gradient effect. You may need to repeat this step a few times to achieve the desired ombre look.
Once you are satisfied with the ombre effect, clean up any excess polish around your nails using a cotton swab dipped in nail polish remover. Finish off your design with a clear top coat to seal in the colors and add a glossy finish.
With a little patience and practice, you can master the art of ombre nails and create a stunning DIY manicure that rivals any professional salon design.
Marble Nail Design Steps
Are you tired of the same old solid color nail polish? Try something different by creating a marble nail design. The marble nail design is a unique and eye-catching pattern that can be achieved with just a few simple steps.
To begin, gather all the necessary supplies, including a base coat, nail polish in the colors of your choice, a white nail polish, a small bowl of water, a toothpick, and some tape to protect your skin from the nail polish. Start by applying a thin layer of the base coat to protect your nails from discoloration.
Next, choose the nail polish colors you want to use for the marble design. Drop a few drops of each color into the bowl of water, creating a bullseye pattern. Then, use the toothpick to gently swirl the colors together to create a marble effect in the water.
Once you are satisfied with the design in the water, carefully dip your fingernail into the water, allowing the nail polish to transfer onto your nail. Use the toothpick to clean up any excess polish left on the surface of the water. Once your nail is fully submerged, carefully remove your finger from the water.
Finally, clean up any excess nail polish around your nail using a cotton swab dipped in nail polish remover. Finish the look with a top coat to seal in the design and add a glossy finish. With just a few simple steps, you can achieve a beautiful and unique marble nail design that is sure to turn heads.
Geometric Nail Pattern How-To
Creating geometric nail patterns is a fun and creative way to add some flair to your nail art. Whether you’re a beginner or an experienced nail artist, there are a variety of techniques you can use to achieve stunning geometric designs.
One popular method is using striping tape to create clean lines and shapes on your nails. After applying a base coat, you can stick the striping tape in different patterns and paint over it with your desired nail polish colors. Once the polish is dry, simply peel off the tape to reveal the geometric design underneath.
Another technique is using nail stamping plates to transfer intricate shapes and patterns onto your nails. These stamping plates come in a variety of geometric designs, such as triangles, squares, and diamonds, making it easy to create a precise and professional-looking nail art. Simply apply the desired polish onto the stamping plate, scrape off the excess, and then transfer the design onto your nails using a stamping tool.
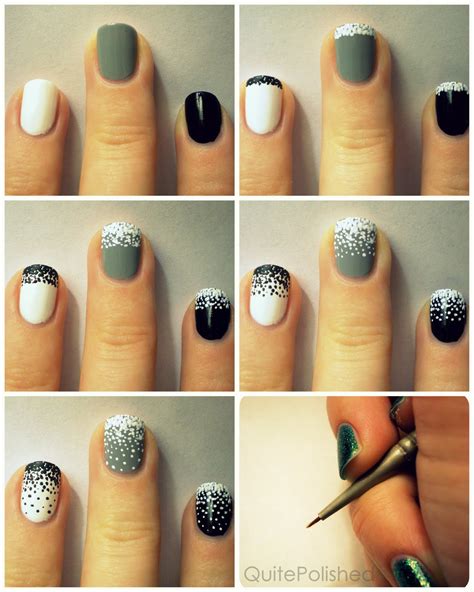
If you prefer a more freehand approach, you can use nail art brushes and dotting tools to create your own geometric designs. This method allows for endless creativity and experimentation, as you can mix and match different shapes, colors, and textures to achieve a truly unique nail art look.
| Tools Needed: | Striping tape | Nail stamping plates | Nail art brushes and dotting tools |
|---|---|---|---|
| Materials Needed: | Base coat | Nail polish in various colors | Nail stamping polish (if using stamping plates) |
With these techniques and tools at your disposal, you can easily master the art of creating geometric nail patterns. Whether you opt for the precision of striping tape, the convenience of nail stamping plates, or the freedom of freehand designs, the possibilities are endless when it comes to incorporating geometric nail art into your manicure routine.
Floral Nail Art Technique
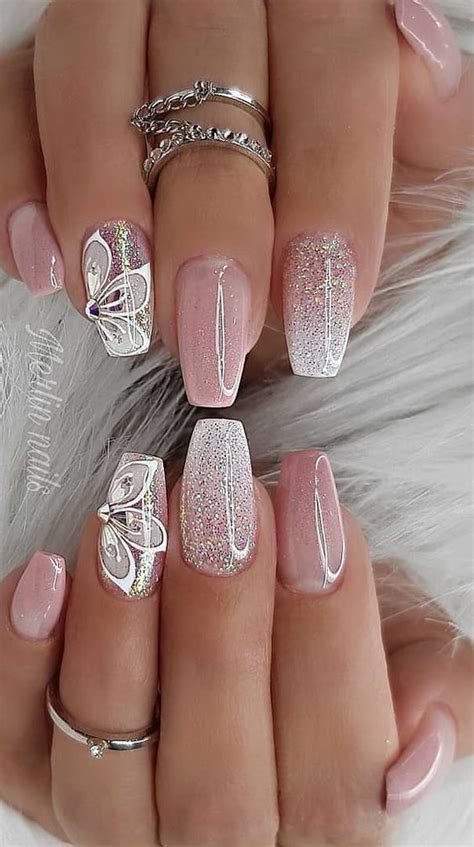
Floral nail art is a beautiful and intricate design that is perfect for any season. Whether you’re preparing for a spring picnic or a summer wedding, floral nails are a versatile and stunning way to add a touch of femininity to your look.
One of the key tools for creating a floral nail art is a small detail brush. This will allow you to paint delicate petals, leaves, and stems with precision. You can create a variety of floral designs, from dainty daisies to vibrant roses, using different brush strokes and techniques.
To start, apply a base coat to your nails and let it dry completely. Then, using a light shade of nail polish as your base color, create a smooth and even coat on each nail. Once the base coat is dry, use your detail brush to paint small floral designs on each nail. You can also use a dotting tool to create the center of the flowers.
For added dimension and detail, consider using multiple colors to create a more realistic floral look. You can also add accents, such as glitter or rhinestones, to enhance your floral nail art. Once you’re finished, seal your design with a clear top coat to ensure it lasts.
With practice and patience, you can master the art of floral nail designs and impress your friends with your beautiful and intricate nail art. So, gather your favorite nail polishes and brushes and get ready to create stunning floral nail art!

