Discover what a damask pattern is and learn how to create stunning damask pattern nails. Get tips on choosing the right nail colors and tools for a long-lasting manicure.
What is a damask pattern?
Contents
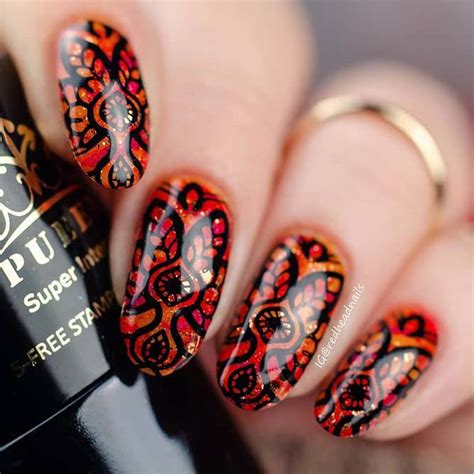
A damask pattern is a decorative design that originated in the city of Damascus, hence the name. It is known for its intricate and ornate look, often consisting of floral motifs, intricate geometric shapes, and a distinctive background texture. This pattern is commonly used in textiles, such as curtains, upholstery, and tablecloths, but it has also made its way into other areas of design, including nail art.
The damask pattern is characterized by its elegant and timeless appearance, making it a popular choice for those looking to add a touch of sophistication to their nails. The design typically features a combination of bold and delicate elements, creating a visually captivating look that is perfect for special occasions or everyday wear.
In nail art, the damask pattern can be created using various techniques, such as stamping, freehand painting, or the use of nail art decals. The key to achieving a stunning damask pattern on the nails is attention to detail and precision, as the intricate nature of the design requires a steady hand and careful application.
Overall, the damask pattern is a versatile and artistic design that adds a touch of luxury and sophistication to nails, making it a popular choice for those who want to elevate their manicure to the next level.
How to create damask pattern nails
If you’re a fan of intricate and elegant nail designs, then creating damask pattern nails will be right up your alley. This classic pattern is characterized by its ornate and detailed design, often featuring floral and geometric motifs. The good news is, you don’t have to be a professional nail artist to achieve this look. With the right tools and a bit of patience, you can create stunning damask pattern nails at home.
To get started, you’ll need a few essential tools including a base coat, a selection of nail polishes in contrasting colors, a thin nail art brush, and a top coat. The base coat will help your nail polish adhere better and prevent staining, while the top coat will seal and protect your design.
Next, you’ll want to choose the right nail colors for your damask pattern nails. Traditionally, damask patterns feature rich and luxurious colors like deep reds, royal blues, and golden yellows. However, you can also experiment with pastel hues for a softer and more modern twist.
Now comes the fun part – creating the actual pattern. Using a thin nail art brush, carefully paint on the intricate design of your choice. This could be a floral motif, a swirling pattern, or a geometric shape. Take your time and work slowly to ensure precision and accuracy. If you make a mistake, don’t worry – you can always use a cotton swab dipped in nail polish remover to clean up any smudges.
Once you’re happy with your design, finish off your damask pattern nails with a layer of top coat to protect your handiwork and add a glossy shine. Now, you’re ready to show off your stunning new manicure and impress everyone with your intricate nail art skills.
Choosing the right nail colors
Choosing the right nail colors can make a big difference in the outcome of your damask pattern nails. When it comes to nail art, the colors you choose can really make or break the design. It’s important to consider the overall look you want to achieve and select the colors that will best complement each other.
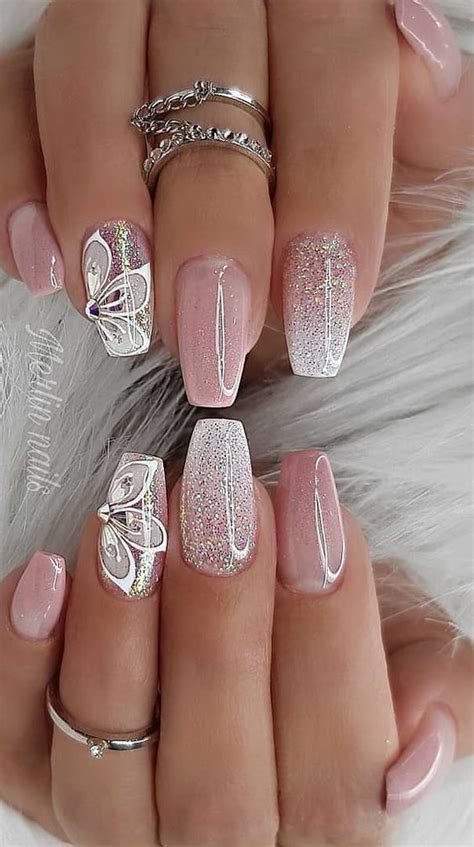
One important thing to keep in mind when choosing nail colors for a damask pattern is to make sure there is enough contrast between the colors. For example, if you choose a light pink as your base color, you’ll want to use a darker color for the damask pattern so that it stands out. This will ensure that the pattern is clearly visible and doesn’t get lost in the background color.
Another factor to consider when choosing nail colors for your damask pattern nails is the overall color scheme you want to create. If you’re going for a more traditional look, you might opt for classic colors such as black, white, and gold. However, if you want to get creative, you can experiment with bold and unexpected color combinations to make your nail art stand out.
When in doubt, you can also refer to a color wheel to help you choose colors that work well together. Complementary colors, which are located opposite each other on the color wheel, can create a striking effect when used together. Analogous colors, which are next to each other on the color wheel, can create a more harmonious and cohesive look.
Tools needed for damask nail art
Tools needed for damask nail art
Tools needed for damask nail art
Creating a beautiful damask pattern on your nails requires the right tools to achieve the perfect look. Some of the essential tools needed for damask nail art include:
Nail Art Brushes: Invest in a set of fine nail art brushes to help you create intricate damask designs with precision. These brushes come in various sizes and are perfect for detailing and fine lines.
Nail Stamping Kit: A nail stamping kit is a must-have for creating uniform and symmetrical damask patterns. Choose a kit with a variety of design plates to achieve different damask motifs and shapes.
Nail Polish Palette: Select a range of nail polish colors that complement each other and can be used to create contrasting damask designs. A palette of rich, vibrant colors will bring your damask nail art to life.
Top Coat and Base Coat: Finish off your damask nail art with a high-quality top coat to seal in the design and protect it from chipping. A base coat will also help your nail art last longer and prevent any staining to your natural nails.
Tips for a long-lasting damask manicure
When creating a damask pattern manicure, it’s important to ensure that it lasts as long as possible. To achieve a long-lasting manicure, start by prepping your nails properly. Use a gentle nail polish remover to clean your nails and remove any oils or residue. This will help the polish adhere better and prevent chipping.
Next, apply a base coat to create a smooth surface for the polish to adhere to. Allow the base coat to dry completely before moving on to the next step. Once the base coat is dry, carefully apply your chosen nail colors in thin, even layers. This will help the polish dry faster and last longer.
To create a damask pattern, you’ll need a few tools such as nail stencils, nail art brushes, and a small dotting tool. Make sure to invest in high-quality tools to achieve precise and professional-looking results. When creating the pattern, take your time and work slowly to avoid mistakes.
After the pattern is complete, finish your manicure with a high-quality top coat. This will seal in your design and add extra protection to prevent chipping and fading. Allow the top coat to dry completely before using your hands for any activities.

