Discover classic French manicure, color block nail art, marble nail effect tutorial, ombre nail art how-to, and geometric nail design tips in our latest blog post. Perfect your nail art skills today!
Classic French Manicure
Contents
A classic French manicure is a timeless and elegant nail design that never goes out of style. It is a versatile look that is perfect for any occasion, whether you’re going to a formal event or just want to add a touch of sophistication to your everyday style.
To achieve the perfect French manicure, start by shaping your nails into a natural oval or square shape. Then, apply a sheer pink or nude base coat to your nails to create a clean and polished look. Next, use a white nail polish to create a thin line at the tip of each nail, following the natural curve of the nail. For a more precise line, you can use nail guides or tape to help create a clean and even line.
Once the white tips are dry, apply a clear top coat to seal in the design and add shine to your nails. Your classic French manicure is now complete, and you can enjoy your elegant and sophisticated look!
If you want to add a modern twist to the classic French manicure, you can experiment with different nail shapes, colors, and even add decorative accents such as rhinestones or metallic studs. The possibilities are endless, so have fun and get creative with your French manicure!
Color Block Nail Art
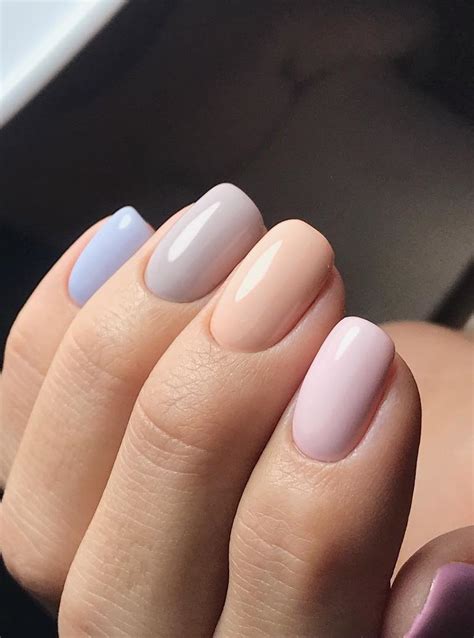
If you’re looking for a fun and exciting nail art design that’s easy to create, color block nail art is the perfect choice. This trendy and modern nail design involves using different colors to create bold, geometric shapes on your nails. Whether you’re a nail art novice or a seasoned pro, color block nail art is a great way to show off your creativity and make a statement with your manicure.
One of the best things about color block nail art is that you can use any combination of colors to create a unique and personalized look. Whether you prefer bright, bold shades or subtle, muted tones, the possibilities are endless. You can also experiment with different shapes and patterns, from simple stripes to more intricate designs.
To create your own color block nail art, start by prepping your nails and applying a base coat. Once your nails are ready, use a thin nail art brush to create geometric shapes with your chosen colors. You can also use nail tape or stickers to help create clean, crisp lines. Once your design is complete, finish with a top coat to seal in your artwork and add shine.
Color block nail art is a versatile and stylish nail design that’s perfect for any occasion. Whether you’re getting ready for a special event or just want to add some flair to your everyday look, color block nail art is sure to turn heads and make a statement. With a little practice and creativity, you can master the art of color block nail design and create stunning manicures that showcase your personal style.
Marble Nail Effect Tutorial
Are you looking for a unique and eye-catching nail design to try at home? Why not give the Marble Nail Effect a try? This stunning nail art technique creates a beautiful, swirling effect that looks like real marble. In this tutorial, we will show you how to achieve this gorgeous look on your own nails with just a few simple steps.
To begin, gather all the necessary supplies. You will need a few different nail polishes in colors of your choice, a nail art brush or toothpick, a small cup of room-temperature water, and some tape or liquid latex for easy clean-up. Once you have everything you need, you can start by applying a base coat to your nails to protect them and help the design last longer.
Next, choose your desired colors for the marble effect. You will want to work quickly, as the polish will dry in the water. Once your colors are ready, drop a few drops of each polish into the water. Use the nail art brush or toothpick to create a marble effect by swirling the colors together. Once you are happy with the design, dip your nail into the water, allowing the polish to stick to your nail.
After removing your nail from the water, clean up any excess polish around your nail using a cotton swab and nail polish remover. Finish with a top coat to seal in your design and add a beautiful shine. You now have a gorgeous marble nail effect that is sure to impress everyone!
Ombre Nail Art How-To
Creating ombre nail art is a fun and easy way to add a gradient of color to your nails. To start, you will need a few nail polishes in the colors of your choice, a makeup sponge, and some nail polish remover for cleaning up any mess. Begin by applying a base coat to your nails to protect them from staining. Then, paint your nails with the lightest color you have chosen. Make sure the polish is completely dry before moving on to the next step.
Now, it’s time to create the ombre effect. Take your makeup sponge and dab a small amount of each of your chosen colors onto it. Gently press the sponge onto your nails, starting at the tip and working your way down towards the base. You may need to reapply the polish to the sponge several times to achieve the desired level of opacity. Once you are happy with the gradient, allow the polish to dry completely before adding a top coat to seal in your design.
If you make any mistakes or get polish on your skin, use a small brush dipped in nail polish remover to clean up the edges. Practice makes perfect, so don’t be discouraged if it doesn’t turn out perfectly on your first try. With a little patience and practice, you’ll be creating beautiful ombre nail art in no time!
Geometric Nail Design Tips
Geometric nail designs are a popular trend in the world of nail art. They offer a modern and sleek look that can be customized in various ways. When creating geometric nail designs, it’s important to choose colors that complement each other and to have a steady hand. One popular geometric design is the triangle pattern. You can achieve this look by using nail tape to create clean lines and then filling in the spaces with different colors. Another geometric design to try is the negative space look, where you leave parts of your nails bare to create a minimalist and modern design. One more geometric design tip is to use angled lines to create interesting and dynamic patterns on your nails.
If you’re new to geometric nail designs, you can start by using neutral colors like black and white to create simple yet impactful designs. Once you feel more confident, you can experiment with bright and bold colors to create more eye-catching looks. Remember to take your time and practice your nail art skills to achieve clean and precise lines. Using a fine-tipped nail brush or nail art pen can make it easier to create intricate geometric designs.
For those who want to take their geometric nail designs to the next level, consider adding metallic accents or rhinestones to your designs. These elements can add a touch of glamour and sophistication to your nails. You can also experiment with different shapes like diamonds, squares, or chevron patterns to create unique geometric nail designs. If you’re feeling extra creative, try mixing and matching different geometric patterns on each nail for a fun and playful look.
In conclusion, geometric nail designs are a versatile and trendy option for those who want to add a modern edge to their manicure. By following these tips and experimenting with different colors and patterns, you can create stunning geometric nail designs that will impress everyone. Whether you’re a beginner or an experienced nail artist, there are endless possibilities when it comes to creating geometric nail art. So grab your nail polish and get ready to unleash your creativity!

